Share
Pin
Tweet
Send
Share
Send

You can cook it from kefir or sour milk, or from a mixture of both products. If the milk curdled upon boiling, then it can also make an excellent curd.
To make cottage cheese at home, it is best to use natural homemade cow's milk. If this is not possible, then store milk with a fat content of at least 3.2% is quite suitable. To get about 300 g of home-made cottage cheese in the end result, I needed 2 liters of milk.

The process of preparing this fermented milk product itself took me a third of an hour, but the preparation for it took about two days.
So, to the point!
We pour the milk from the bags into a glass jar with a capacity of 3 liters - you can also 2, if there is one - and close the lid.

If possible, we put the filled vessel in a warmer place, but in the absence of one, we simply leave it on the table or window sill. After about a couple of days - maybe sooner - the milk will turn sour, which will be evidenced by the formation of two types of liquids of different consistencies: at the bottom of the jar there is a translucent serum and on top a white, thick curdled milk.

Now you can start cooking cottage cheese. To speed up the process of souring milk, you can add a glass of kefir or 100 g of sour cream or a crust of rye bread to the jar. Then 2 days will not be required. At the bottom of the pan, the height of which should be slightly lower than the can, we put a napkin rolled up in 4 (at least) layers.

We place the jar in the pan, removing the lid, and pour cool water to the level of filling the glass container.

We put our construction on a strong fire, mix the contents of the can and heat it.

After boiling water, we reduce the fire and after 5 minutes we take out the jar from the pan. If you hold the yogurt on the fire longer, the cottage cheese will turn out to be drier and not very tasty. Now the serum has acquired a dull yellowish tint, and the yogurt has turned into white cereal flakes.

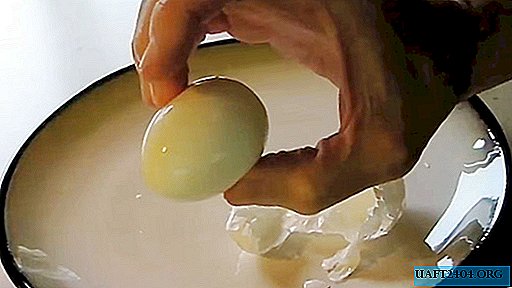
We take the second pan, set a colander on it, cover it with a double layer of gauze on top, and pour the contents of the jar into the prepared structure.


After letting the bulk of the whey drain into the pan, tie a gauze onto a knot and hang it somewhere until the moment when the moisture ceases to stand out from the curd.

As a result of the manipulations with milk, we got more than a liter of whey and a very decent amount of home-made tender curd.

It remains to season the finished product with sugar and sour cream, and proceed with the long-awaited enjoyment of its pleasant taste.

Serum should not be rushed to pour into the sink. It is useful for preparing a luxurious yeast or pancake dough, from which the pastries are very lush and tasty.
Enjoy your work!
Share
Pin
Tweet
Send
Share
Send