Share
Pin
Tweet
Send
Share
Send
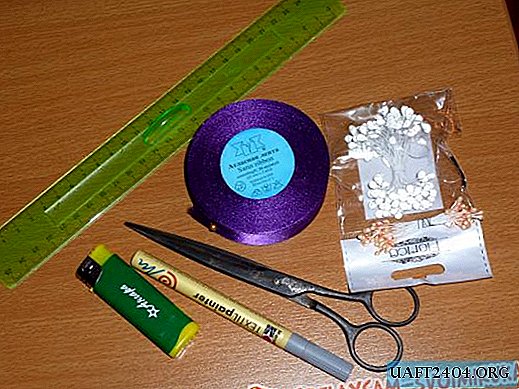
- satin ribbon 2.5 cm wide. By the way, I used the tape in purple, but the flash on the camera decided that he had better be blue.
- pencil, ruler, scissors;
-lighter. With it I lit a candle - it turns out much more economical;
stamens. I just collected all the remnants that were in the suitcase.
First of all, I decided to prepare all the components of the future bow. To do this, cut the tape into segments of 5 cm.

A bow took me about 100 petals. The most laborious and monotonous process begins - the formation of a petal. Each segment must be cut off from one edge in a semicircle.

Now the most important thing. The rounded edge of the petal should be slightly heated over a fire, and carefully try to stretch in different directions. It is better to make one side first, and then the other.

Let's deal with the bottom edge. Its angles must be overlapped with the front sides inward and the lower edge sealed on the fire. We get here such an interesting petal.

I decided not to interrupt the work at the most crucial moment, to make petals from all segments.

In a couple of petals, I decided to put the stamens.

Somewhere it turned out in a pair, somewhere more. We proceed to the assembly of the flower itself. To do this, use two circles of leather with a diameter of 5 cm.

Glue the first row of ordinary petals with an adhesive gun on the edge from 0.5 to 1 cm.

The second layer also consists of ordinary petals, but you need to stick it between the petals of the first row, as if in a checkerboard pattern.

The third and fourth row are pasted in the same way. The main rule is not to shift them to the center. In other words, the diameter of the center should be the same in the first and fourth rows. Thanks to this move, the petals in the last rows, due to their size, create additional volume, and the bow turns out to be magnificent.


We begin to glue the middle. The fifth row is no longer glued to the top, but to the base. For better fastening, you can put a drop of glue on the bottom of the back of the petal and stick to the wall obtained from the previous rows.


The next row is filled with petals with stamens.

There remains a small circle.

I just filled it with glue and put the remaining petals with stamens into it.

When the bow itself is ready, it is worth considering its fastening. To do this, I decided to use a second circle of leather, a clerical knife, and a hairpin base.

To make the hairpin look as dear to the bow as possible, it is better to disassemble it.

On the back of the base, with a pencil, make marks equal to the width of the hair clips in the right places.

We make cuts with a clerical knife on them and gently drag the edges of the hairpins into them.

Next, glue the base with a hairpin to the base with a bow, and collect the hairpin.

In the end - this is such a bow.


Share
Pin
Tweet
Send
Share
Send