Share
Pin
Tweet
Send
Share
Send
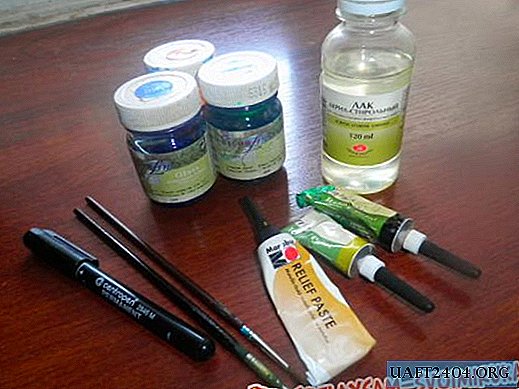
So we take:
• Black A4 paperboard two sheets;
• Scrapbooking paper in black-brown and beige-brown colors, sheets 20 * 20 cm in size;
• Color pictures with different male illustrations and different shapes: watches, cars, coffee, etc .;
• Tape in the box, white and gray from satin 15 mm wide;
• Narrow rep ribbon of brown color;
• Dark brown satin ribbon with white polka dots 18 mm wide;
• Birds made of polymer clay brown and dark brown;
• Dark brown polymer clay frame;
• Cutting down gears in beige;
• The petals are brown;
• Waxed brown cord;
• Metal pendant clock bronze color;
• Brown beads;
• Ink pillow in black;
• Curb punchers;
• Printed inscriptions “Happy Birthday”;
• Pencil, scissors, glue gun, ruler, double-sided tape, PVA glue.

First cut out the basics for the envelopes. One envelope will be horizontal, and the second will be vertical. First, prepare the basis for the vertical envelope. We divide the sheet into three parts, expanding it horizontally and measure 10 * 10 * 10 cm, and measure the height of the envelope 19 cm.


We draw bending lines and lay the foundation. We cut off the inside pocket by half. This basis is ready, proceed to the basis of the horizontal envelope.


The sheet, on the contrary, is laid vertically and divided into three parts 8 * 9 * 9 cm and a width of 20.5 cm.


We also bend and fold the base. All are ready both, we proceed to decorating.


Envelopes will be tied, so we cut two different ribbons, two cuts each with 12-13 cm.


Glue with double-sided tape in the center of each. Now cut the scrapbook paper.


For a horizontal envelope, measure out two blanks of 8.6 * 20 cm and one 7.7 * 20 cm.


For a vertical envelope, measure out two blanks of 9.5 * 18.7 cm and one 9.3 * 9.5 cm.


We cut out two inscriptions and tint each of them at the edges with an ink pad. On the left, decorations prepared for a vertical envelope, and on the right for a horizontal one.


From the remnants of scrapbook paper we make such decorative strips with a hole punch. We collect the first envelope.


And now the second one. We sew on the typewriter pictures with inscriptions. Openwork stripes glue PVA.


Now the finished decorated blanks are glued with double-sided tape each on its own base.


Stitch each side on a typewriter. Then glue the pockets on the sides with PVA glue.


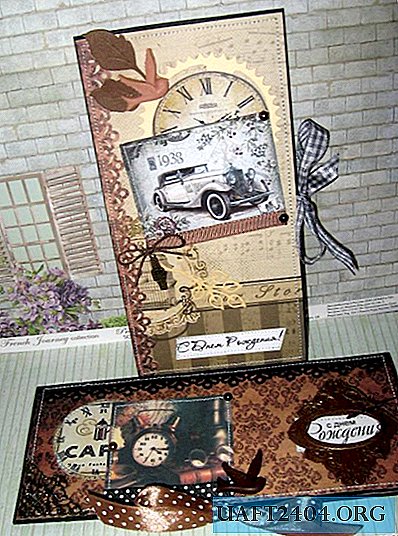
There is very little left, we glue the whole decor, as in the photo with a glue gun and you're done!


Thanks for your attention.


Share
Pin
Tweet
Send
Share
Send