Share
Pin
Tweet
Send
Share
Send
For tailoring we need:

- fur, in our case, light mink fur.
- fabric for the abdomen and ears in a color suitable for the fur (we have pink).
- synthetic winterizer.
- threads, needles, scissors.
- ruler.
- paper for drawing or sheets in a cage.
- pencil.
- three beads of black color: two identical for the eyes and one larger for the nose.
Work algorithm.
1. First, determine the size of the toy. We should get a medium-sized mouse. Based on these preferences, we draw a pattern on a sheet of paper using a ruler with a pencil.
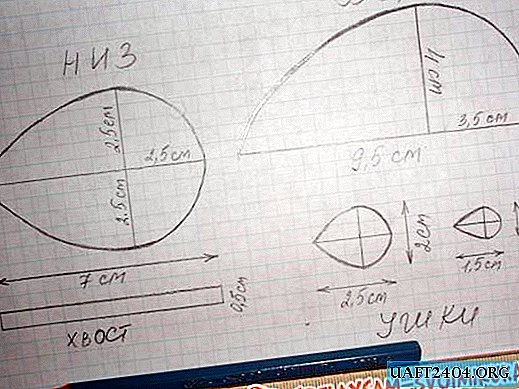
The bottom of the mouse, namely the abdomen, we will cut from the fabric.

The top, or the main part, will be sewn from mink fur.

The ears will consist of two parts, most of the fur, the smaller of the fabric.

The tail will be a thin strip of fur.
2. Cut out patterns from paper. We impose a bottom pattern and a smaller part of the ears on the fabric, we pin it off with needles.

Do not forget that the ears should be two pieces.
3. Cut out the details from the fabric. For the abdomen we make an allowance of 0.5 cm, for the ears an allowance is not needed.

We got three details.

4. We impose a top pattern on the back of the fur and pin it with needles.

It is necessary to arrange the pattern according to the growth of fur hairs, so that the pile on the back of the mouse looks back.
There should be 2 such parts.
5. We pin the pattern of the lower side of the ears to the fur, observing the same principle as for the back.

We do this for both ears.
6. Cut out the details of the fur. For the top we make an allowance of 2-3 mm, for other parts an allowance is not necessary.
Do not forget to cut the tail, according to the pattern and without allowance.

7. Gently sew the back from the inside along the upper convex edge.

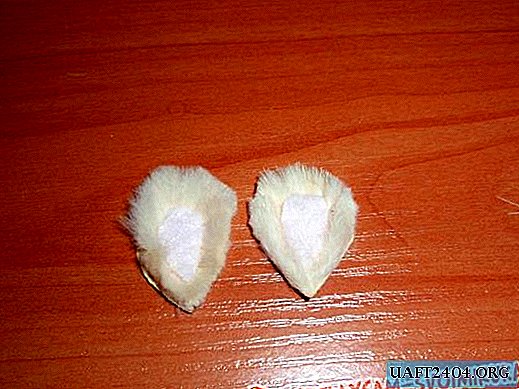
8. We take the details of the ears of fur and fabric.

We put the fabric part on the front side of the fur with the wrong side down and sew it manually on the edges. There is no need to make stitches often, just grab in several places.

We do this with the second ear. Excess clumping fur is carefully trimmed with sharp scissors.
9. Sew the ears to the details of the top.

10. Sew the abdomen with the back, while stitching the tail in the back of the product. Leave a hole for filling with padding polyester.

11. Fill the product with synthetic winterizer quite tightly.

Sew a hole.

12. We take a mouse blank, all beads and a needle with a thread.

Sew on the muzzle eyes and nose. The beads for the eyes are selected in black, however you can use other colors. It is advisable to take a bead for the nose larger than for the eyes.

We trim the fur on the face with scissors so that the eyes can be seen, and the animal looks more like a real mouse.
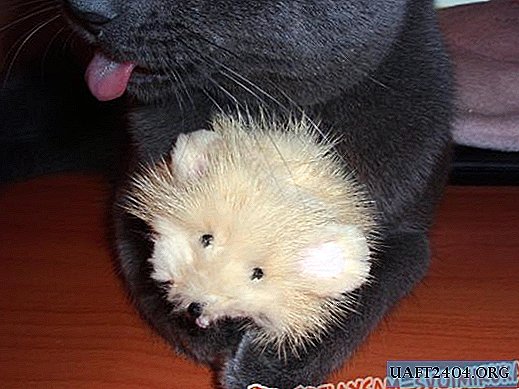
The mouse is ready.

Now you can comb it and give it to your beloved cat to play.

Sewing a fur toy is an interesting and most importantly useful activity. It will require accuracy and patience, but all the work will be rewarded with the joy of your favorite.
Give your cat such a toy, and he will thank you with a medical purr.
Share
Pin
Tweet
Send
Share
Send