Share
Pin
Tweet
Send
Share
Send
We will consider in detail a master class on making a toy house.
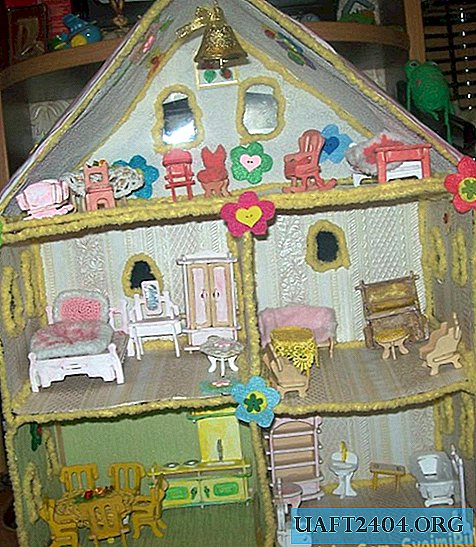
So, we will prepare for work: a cardboard box, glue, adhesive tape, pieces of wallpaper, yarn, furniture made of plywood, felt, ice cream sticks, fabric.
The first stages of our work will be the manufacture of the layout of the house. We will make it out of a cardboard box. To do this, take the box, glue it, cut it, cut out the space for the windows. You can wallpaper one room. Here's how it will look in the photo.

Here's how our house will look on the other side.


Then you need to wallpaper all the rooms of our house, by the way, we have several of them: the kitchen - green wallpapers, a living room, a bedroom, a bathroom and a nursery at the very top.

Now we begin to manufacture the roof. To do this, use sticks from under the ice cream to glue it, this is necessary so that our roof is strong.

On the reverse side we glue the house with white paper.

When this is ready, you need to take the yarn and glue it sequentially over all those places that need to be hidden. It is necessary to make sure that cardboard is not visible at the joints between the parts. This function will perform colored yarn. Further upstairs, you can hang a bell so that everyone in the child’s game will come to his house to call him.

This is how our rooms will look at a higher approximation. Now you can decorate our house on the reverse side (it is possible to use colored paper for this). Next, you need to make a crush of fabric and stick it in place, which will give our crafts a more presentable look.


Here's what the flip side will look like.

Well, when the house is completely ready, you need to arrange furniture in it. We ordered plywood furniture, assembled it, decorated it with imagination, and the following elements turned out: a bed, a chair, a mirror, etc.

Our house can be decorated with felt flowers, buttons, beads, etc. The main thing is that the child should like all this!

Share
Pin
Tweet
Send
Share
Send

