Share
Pin
Tweet
Send
Share
Send
Today, badges are placed on jackets, jeans and other things. Moreover, they look differently - either creating a romantic, then strict, or rebellious image. Therefore, I propose to make an icon out of a plastic container with my own hands.
We will need:
- a transparent plastic container;
- brush;
- picture for the icon (any);
- permanent marker;
- nail polishes or acrylic paints;
- a small pin or base for a brooch;
- a piece of felt;
- glue gun;
- scissors.

Let's get started!
Step 1. Preliminary work: wash the container with warm water, remove stickers and glue. Let it dry well. Note! The PS6 mark must be on the packaging of the container, as only this kind of plastic shrinks in heat.

Step 2. Take a plastic container. We cut off only the even part from it (we will not need the corrugated one). We apply the cut plastic to the picture and outline the whole picture. It is better to use a thin marker to make the drawing neat and clear. Please note that the icon blank should be two or three times larger than the desired result, because the plastic will shrink and the pattern will be much smaller.


Step 3. Cut along the contour.

Step 4. Place the blank of the badge on a baking sheet lined with foil or parchment paper. Preheat the oven to 200 degrees. Place the pan in the oven for 30 to 60 seconds. Soon, the plastic will begin to bend, but then it will straighten and shrink. You can get the workpiece from the oven. She became harder and less.

Step 5. While the workpiece is still hot, press it down with something heavy, such as a mug. So, she will become more direct.

Note: my workpiece was 10 cm before baking, and 3 cm after.
Step 6. We begin to colorize. To do this, use nail polishes or acrylic paints. You can color from any side. Feel free to paint over all the lines, because the back of the line will still be visible.

So it looks from behind.

So it looks in front.

Step 7. Add some highlights to make the ice cream more realistic. We apply a small amount of nail polish to the toothpick and make small glare on the icon. If desired, you can cover the icon with transparent nail polish.


Step 8. Make a mount. Using a glue gun, glue a small pin to the badge, and glue a small piece of felt on top for reliability.

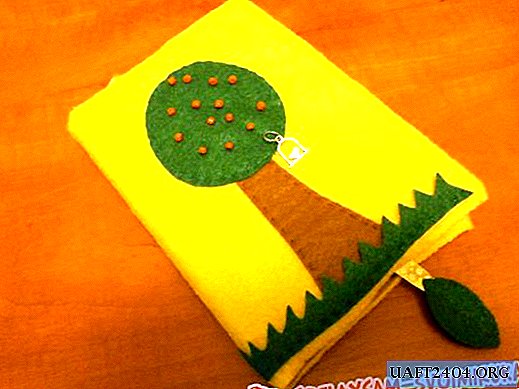
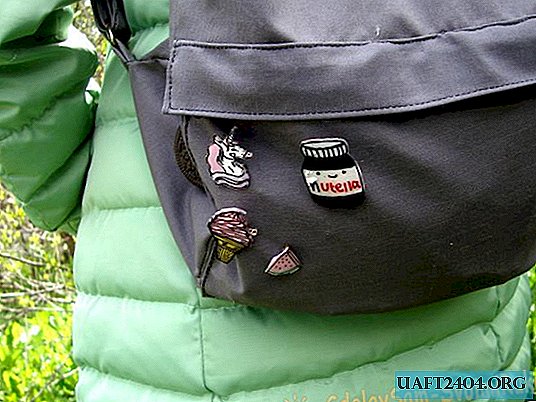
Our stylish badge is ready!

Badges will make any clothes brighter, more noticeable and more interesting. And they set the tone not only for clothes, but also for accessories. The badges will turn even the most boring bag into trendy and bright.
Share
Pin
Tweet
Send
Share
Send