Share
Pin
Tweet
Send
Share
Send
After completing the installation of the next local computer network, as always in such cases, a bunch of scraps of plastic boxes formed (Fig. 1).
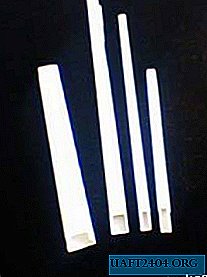
Fig. one
You can, of course, collect them and somehow use them next time. But ... First, when will he be - this next time? Secondly, then perhaps boxes of completely different sizes will be required. And finally, thirdly, where to store these scraps, the number of which is increasing? ... The answer to these questions suggests itself: it is necessary to "create" something useful from them ...
My attention in this regard - I don’t know why myself - was primarily attracted by the box shown in Figure 2. Felts with their square profile, roofing felts of sufficiently high stiffness (others had very thin, some kind of "thin" walls), roofing felts for some reason that. He opened the box (Fig. 3), measured the base and the lid.
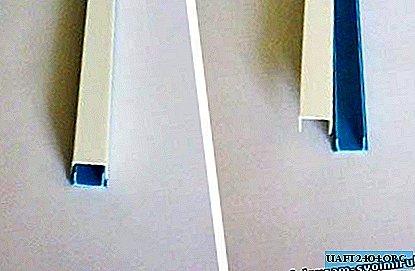

Fig. 2 Fig. 3
The decision came when, in thought, "stuck" a box on the laser disc that was at hand in the base of the box. She entered rather tightly, as if made exactly to size, and remained standing on the table with the base of the box (Fig. 4). And if you try two thin boxes? The result (Fig. 5) is the same! With discs in paper envelopes, everything is much simpler. 7-8 pieces (fig. 6) fit tightly into the base (without risk of damaging the envelope!)


Fig. 4 Fig. 5 Fig. 6
As the saying goes in such cases: "Eureka!"
But what if you make a shelf or whatnot for disks? Now, finally, it will be possible to sort the disks stored in stacks (Fig. 7), and easily get to the right one at the moment, without risking to “fill up” the stack when removing the lowest box or envelope.

Fig. 7
Of course, they may object that for this a fairly wide assortment of the most diverse designs is presented in stores. But, firstly, far from everywhere they can be purchased, secondly, the prices of these products (in my opinion) are too high, and finally, and thirdly - and this is the most important thing - it’s much more pleasant to use something that do it yourself!
Let's get started!
For work, we need (Fig. 8):
- Superglue "502 CYANOACRYLATE ADHESIVE" or similar (1);
- alcohol (2);
- a hacksaw (3);
- side cutting pliers (4);
- clerical knife (5);
- a miter box (preferably!) (Fig. 9).


Fig. 8 Fig. 9
First, using side cutters (or better, a miter box), we cut the bases into strips of 12 cm each. The width of the standard box for disks is 14 cm. The bases are cut shorter than the boxes so that the boxes on the shelf protrude a little and they can be pulled out by prying the desired box from below. But - this is a matter of taste. Strips can be cut along the length of the box. Having cut the required number of strips, we process the places of cuts with an office knife and side cutters to remove burrs and sharp edges and corners. Putting the strips together, we determine the width of the future shelf.
Now, using the miter box (or drawing triangle), from the covers of the casing we cut the details of the base of the shelf so (Fig. 10, pos. 1) so that the slices are at an angle of 45 degrees (pos. 2). We clean and degrease the gluing places with a cotton swab dipped in alcohol, and glue the base of the shelf from the lid of the box. For more accurate fixation of joints, pre-cut pieces of the base of the box 2-3 cm long can be inserted into the joints of the parts. After the base of the shelf is ready, it is necessary to clean and degrease it and the cut strips, and stick the strips on the base close to each other (Fig. 11). To fasten the resulting shelf to the wall on its base in two places (approximately 1/4 of the length from both edges), make holes.
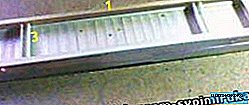
Fig. 10

Fig. eleven
Since the resulting cantilever structure may not support the weight of the disks or break during use, it is necessary to make stops from the covers of the casing (Fig. 12).

Fig. 12
The ends of the stops are cut off at an angle of 45 degrees, and the “petal” with the mounting hole (it can be very easily made with any sharp tool) is bent by heating along the fold line with a soldering iron or over an open fire. To fix the stops to the shelf, it is necessary to glue two strips of the base of the box from the side of its base (Fig. 10, pos. 3). The stops are simply pressed firmly into these bases without any additional fastening, and are attached to the wall with screws.
The result was a pretty nice shelf (Fig. 13) for storing laser disks, the manufacture of which lasted a little over an hour.

Fig. 13
I note that in its manufacture the base of the box is used mainly (in Fig. 2-6 they are blue). And what to do with the "remaining out of work" box covers? From them it is possible to make a whatnot for disks. After all, not all discs will fit on one shelf! The width of the box lid (Fig. 3) allows you to fit the same boxes and envelopes of laser dikes into it, but you can do this completely freely, without effort.
To make a bookcase, it is necessary to cut strips from the lids of the boxes to the same length - 12 cm. However, it should be noted that in this case, for each box (or a pair of thin boxes) it is necessary to have two strips. Putting half the cut strips together and aligning the edges, glue them to each other with side surfaces. Two wall shelves are ready. It remains, using, for example, a sheet of plexiglass or other suitable material, to make the back wall, to glue two side walls to it, observing at the same time that they are parallel and a distance equal to slightly more than the height of the box (13 cm). Glue two plastic strips in the front part (top and bottom) (see Fig. 14-16), which will ensure parallel walls and give the structure rigidity. I additionally fastened the side and back walls by gluing plastic corners left over from previous crafts. From the bottom to the whatnot you can also glue a rectangle of plexiglass, to which, in turn, glue the legs. Caps from plastic bottles, from tubes of toothpaste or creams, etc. can serve as legs. I limited myself to gluing two strips from the bottom, cut from the lids of the boxes (they are visible in Fig. 15). They also serve as the legs of the whatnot.
What I got is shown in Figures 14-16.


Fig. 14 Fig. 15 Fig. 16
P.S. Plastic boxes are so technologically advanced and fertile material for crafts that from them - if you move your brains - you can create a variety of useful homemade products. For example, when it was necessary to install the HUB in a small completely empty closet (do not leave it on the floor!), A shelf was very quickly made from scraps of boxes (Fig. 17), on which this HUB has been resting peacefully for 5 years now ...

Fig. 17
Share
Pin
Tweet
Send
Share
Send