Share
Pin
Tweet
Send
Share
Send
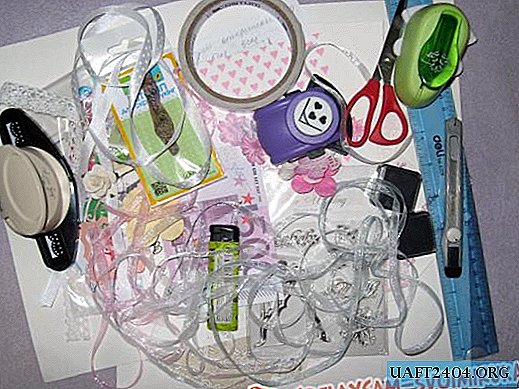
Essential Supplies
Since the structure of a tree of any breed is fibrous and not too dense, the wood sticks together perfectly. Therefore, in the first place, we will need:
- CA glue, which is also called cyanoacrylate or super glue. One of its important qualities is its quick drying, although not as quick as you want.
- To speed up its drying, you can use an aerosol activator, which provides a quick set of strength (hardening) of the glue. It’s better to choose the same brand as super glue.
- Putty on wood of good quality, which is effective and does not shrink. It happens in different colors, so choosing a suitable color for a particular breed of wood is not difficult.
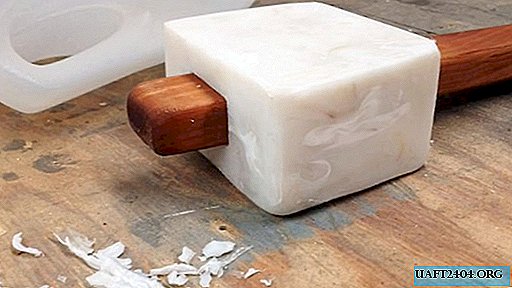
- Ordinary household electric iron, piece of cloth, etc.
Woodworking Error Correction Process
Consider typical defects when working with wooden products, and how to deal with them.
We eliminate chips
Sometimes, when processing workpieces, a piece of wood breaks off.
If it is preserved, the problem is solved quite simply: it is necessary to install it in place with glue. The situation is complicated when this fragment could not be saved or it was lost somewhere. Then you have to use filler, i.e. putty.

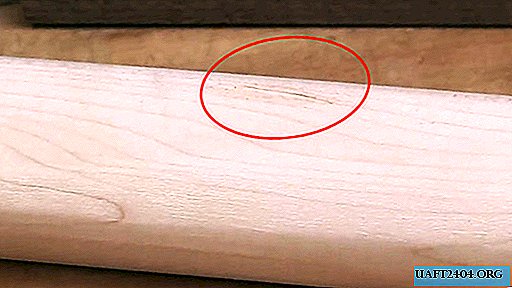
To do this, you should install the tree species in order to choose a putty by color. In our case, the workpiece turned out to be from maple. We select a putty of the appropriate type and, using a small spatula, completely fill the crevice or deep scratch with the selected composition.
Give the putty enough time to dry completely. This process proceeds rather quickly, since the composition has a water base. The jar should always be kept closed so that the contents do not dry out and then it can be used as needed.
After the putty is completely hardened, we process it with sandpaper to achieve the desired profile. As expected, the selected putty by color scheme does not stand out against the background of the natural color of the maple blank.

Now we take a suitable color pencil and draw texture lines along the polished surface of the putty, observing their natural thickness and color saturation. To increase the strength of the restored place on the workpiece, it can be coated with colorless varnish.

Eliminate mistakenly made holes

It happens that a recess is made in the workpiece, a through hole or groove is in the wrong place or to eliminate a serious defect penetrating the body of the workpiece. To mask such an intervention, we make the insert a little larger than the groove, but with a taper to the bottom. This will allow her to easily enter the recess and, as she dives under the blows of the mallet, completely fill the hole along the outer plane. For reliable fastening, the spike and groove should be covered with glue before installation.

If part of the tenon is left outside, it can be cut with a plane and sanded with sandpaper. The main thing in this case is to choose an insert from the same tree as the workpiece, with approximately the same texture.


We repair corner chips

Sometimes at the very end of processing the workpiece, one careless movement leads to the fact that a small, but elongated piece is separated from the array. If you do not lose it and keep it intact, then it is possible to stick it in place with super glue, slightly pressing it with a spatula.


To glue faster, we cover the working area with an aerosol activator. After the final hardening of the glue, the area is lightly treated with a fine emery cloth to remove excess hardened glue.

We restore large angular chips
It happens that at the end of an almost finished billet, a rather large piece of wood with an uneven cross section breaks off. Restoration of a part is difficult if a breakaway fragment is lost or it breaks into pieces.

In this case, it is better to aggravate the defect: brush it with a chisel or a plane and give the base of the damage a flat surface. So it will be easier to eliminate the flaw. To do this, it is sufficient to use a glue with a glue mixed with an aerosol activator to glue a deliberately larger piece of wood and, after a firm grip, process it from all sides until the desired shape in three planes is obtained.


To do this, we need a planer, sandpaper and a saw if the glued fragment protrudes beyond the edge of the workpiece.

Eliminate dents on wood
If a heavy object or tool is dropped on the surface of a wooden product, then a noticeable dent will remain on it, which obviously will not decorate the appearance of the workpiece. What happens with this? Wood fibers from shock are compressed, compacted, as a result of which a dent is formed.

Is it possible to return the wood fibers to their original position? Yes, there is such a way. Pour water on the damaged surface of the workpiece so that it fills the dents with a "margin".

We cover the damage zone with a cloth that absorbs water well. If you now move it with a hot iron, then the water will begin to evaporate and the steam, acting on the crumpled wood fibers, will begin to straighten them. Increasing in volume, the deformed fibers will return to their original state and eliminate the dent.

In order to visualize the process of removing dents, it is necessary to draw flat with an elongated chalk bar at the place where the defect was. If the dent is not completely removed, the area that is not filled with chalk will remain, and steam treatment should be continued.
This method can be used before sanding sandwich plywood to repair small dents and scratches that can occur during transportation, transportation and storage. After such processing, grinding the surface of the plywood will take not so much effort and time, but at the same time high quality will be ensured.
Finishing touch
Sometimes masters add sawdust to super glue or epoxy and use this mixture to correct mistakes. But it should be taken into account that even with an admixture of wood sawdust, they can change the natural color of the repaired workpiece or leave noticeable spots.
When using such mixes, you often have to add paint to adjust the palette. To preserve the natural color of the recovered workpiece, it is best to use colorless products.
Share
Pin
Tweet
Send
Share
Send