Share
Pin
Tweet
Send
Share
Send
Materials:
- unnecessary ax;
- hatchet or bar for its manufacture;
- paper from a self-adhesive film for furniture;
- acetone;
- any varnish
- salt solution.
Restoration and art processing of an ax
First, you need to clean the ax, removing the top rust.

After that, he is given a new form to make him look like a Viking weapon. You will need to cut the front corner of the blade, making it narrower. The back should be rounded inward.
Trimming the ax in front is done by a grinder.

To quickly get the right semicircle in the back, you should use a metal crown. Since it must be applied to the surface for drilling along the entire perimeter, it is necessary to temporarily weld a piece of steel to it to increase the plane.


After drilling, the welded piece is cut off. The resulting workpiece already has the desired shape, but looks rough. It must be well sanded. For this, it is convenient to use the petal circle.


If deep potholes open during grinding, they must be hidden. To do this, the defect is brewed and then grinded.


Using an affordable tool, you need to bring the ax to almost perfect smoothness.


Ax stylization is carried out by artistic etching. Since this is a Viking weapon, it should be decorated with runes and ethnic Scandinavian patterns. To do this, the image selected for etching is printed in a mirror image with a laser printer on a sheet of paper. To transfer the image, back paper from self-adhesive film is used. You need to print on its glossy side, after tearing the film.

The ax is wiped with acetone and placed in an oven preheated to 220 degrees Celsius.

As soon as it heats up, paper sticks to it and gently smoothes it through a cloth until the metal has cooled down.

This is done on both sides of the ax. When it becomes cold, the stickers should be carefully removed. As a result, paint will remain on the metal. Subsequently, during etching, it will retain smooth steel underneath, and everything around it will become dull. Those parts of the ax that do not need to be etched should be painted with a thick layer of varnish.

In a plastic or glass vessel, a solution of edible salt is prepared. Any piece of iron with a wire attached to the negative terminal of the car battery is immersed in it. The ax also sinks into the water, but with a positive terminal attached. As a result, the etching process will begin in the tank, accompanied by the release of gas from the solution. Gradually, the liquid becomes rusty and becomes covered with dirty foam. You should wait 30-40 minutes. If the etch longer, then the matte part of the picture will become deeper, but can begin to corrode and the pattern itself under the paint.

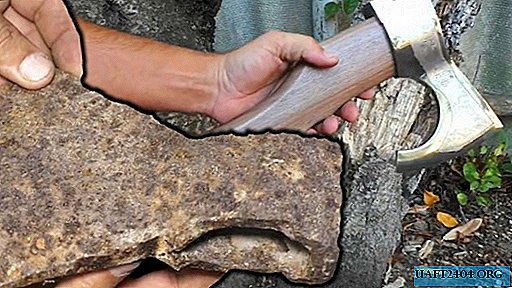
After etching, the ax must be washed off the dark film. Then the acetone erases the varnish and paint. Having finished washing it, you can put a suitable hatchet.


The resulting ax can not only hang on the wall, but sometimes can also be used when preparing firewood for a fire and even cutting meat. Of course, if applied, its specular gloss will quickly go away, so you will have to polish periodically.

Share
Pin
Tweet
Send
Share
Send