Share
Pin
Tweet
Send
Share
Send
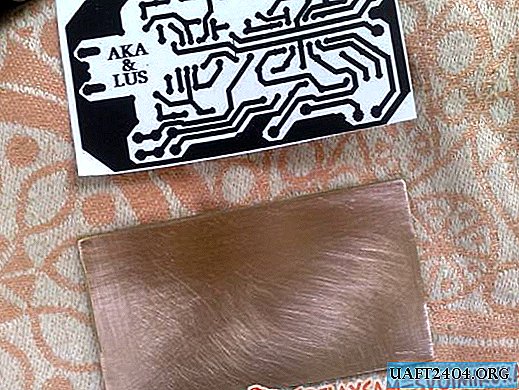
First, prepare a template for the future board.
The board, which is created by special programs for drawing boards, you first need to adjust the brightness and contrast. The template should have maximum brightness. After the board is ready, proceed to print. It is advisable to print several templates on one A4 sheet.


After the board template is ready, you need to cut it from the general sheet.
Next, we prepare foil-coated fiberglass or getinaks, we clean the surface and cut into the dimensions of our board.

Turn on the iron and wait a couple of minutes until the last one warms up.

Next, gently strengthen the paper template with a pattern on the circuit board, the circuit board pattern facing the foil!

Then we begin to iron, make sure that the template adheres evenly to the foil. You need to iron it for 3 minutes, carefully throughout the board, pay strict attention to the edges of the board.
After finishing, let the PCB cool for 5 minutes.
After cooling, we take a vessel with water and wash our board. At the end, we get a clear portrait of the board on the surface of the foil fiberglass.


ETCHING.
For etching, I use a non-traditional method, which is not very often used among radio amateurs. For the chemistry of etching, we need 100mg of hydrogen peroxide (3% peroxide solution), two packs of citric acid (40gr each pack) and one teaspoon of table salt.

Mix everything together and mix well until the salt and citric acid are completely dissolved.
The board is immersed in the solution, it is desirable to put the vessel with the solution in the sun, this accelerates the etching process.

Small-sized boards (boards of bugs, multivibrators, etc.) are etched in 20-30 minutes.


One such solution is enough to etch more than 10 boards for bugs.
Share
Pin
Tweet
Send
Share
Send