Share
Pin
Tweet
Send
Share
Send
To make a chest we need:
• plastic bottles;
• scissors;
• threads for strapping;
• hole puncher;
• needle;
• hook;
• glue;
• alcohol;
• napkins for decoupage.
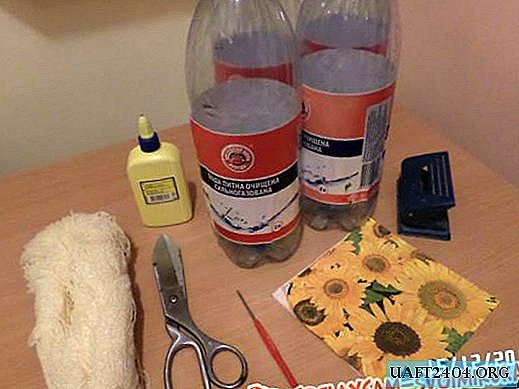
We clear the bottles of labels and cut out plates of the right sizes:
- 4 plates - 25 by 18, 2 plates - 18 by 18, 1 plate - 25 by 22, 2 curly plates (dimensions can be changed).

To prevent the workpieces from twisting, you need to walk on them with something solid and flat (you can use scissors).
In each part, we make holes at the same distance along the perimeter with a hole punch.

Armed with a hook, we bind each plate.

Next, collect the chest. Sew to each other details so that we get a box. Separately, from the plates we sew the lid of the chest. We sew the boxes and the lid together.

Since the chest turned out to be transparent, and all the contents will be clearly visible, we will use the decoupage technique. Thus, we will not only decorate the product, but also hide everything inside. In order for the decoration to lie better on the surface, it must be degreased. To do this, wipe the sides of the chest with alcohol.

Cut a napkin to the size of the plate.

Carefully, so as not to tear, we trim the top layer from the napkin.

Lubricate alternately all sides of the chest and apply a napkin. We try to smooth out the folds. Tape all the product walls with napkins. Give some time to dry. For strength, you can also apply another layer of glue.

To give shine, open the picture with varnish. The chest for the necessary small items is ready.

Share
Pin
Tweet
Send
Share
Send

