Share
Pin
Tweet
Send
Share
Send
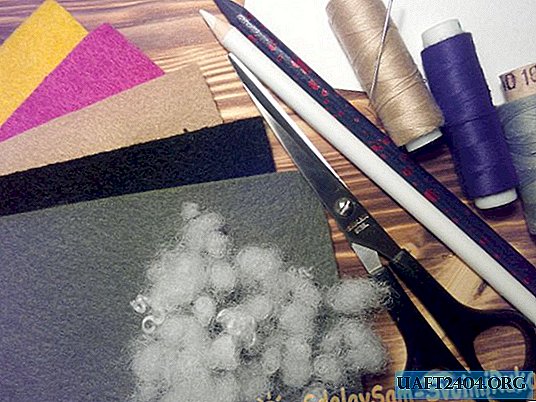
1. To make such a card, you will need:
• 1 sheet of high-density white and color paper (I used watercolor paper and color cardboard);
• Dress template (draw yourself or print any suitable one);
• Glue, scissors;
• Ready-made or home-made stickers for congratulations;
• Ribbon, beads and glitter glue (glitter).

2. Fold the white paper in half and attach a template to it so that the straps of the dress are folded. Circle the template and cut it (you need to cut both layers). Do not cut the straps! In this way you will receive a blank of the future postcard.
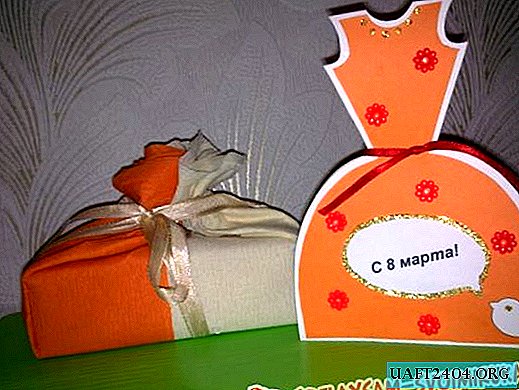
From colored paper, cut two dresses according to the same pattern, reduced by 2-3 mm. Glue them on a white blank as shown in the photo below.

3. First, glue the sticker on the resulting blank. In our case, "From March 8!". Inside, you can also stick a sticker with a congratulation. My handwriting is far from ideal, so I also printed the congratulation on a printer.

4. Now you can start decorating. Glue the beads first, then circle the contours with glitter. Let the glue dry.

5. Glue the ribbon to the back of the card and tie it into a bow. Tie it carefully - the recipient should easily untie it and read your wish. To make the card stand, tie it not too tight, leave a small clearance.

Your original postcard is ready for March 8! Now it remains to originally wrap the gift, and present it to your beloved girlfriend, mom or grandmother!
Share
Pin
Tweet
Send
Share
Send