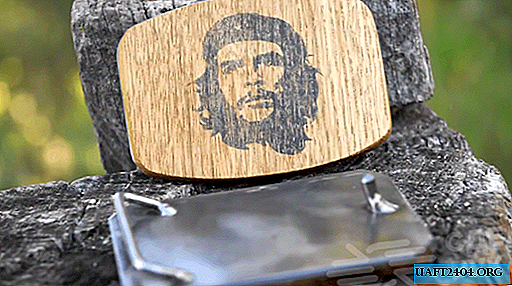
For the manufacture of an original belt buckle with our own hands, we will immediately use two of the most popular materials: metal and wood. And so that the buckle doesn’t look really depressing, we’ll transfer some interesting image to the surface of the wooden lining.

First of all, we cut out a small piece of rectangular shape from sheet steel with a thickness of 2-3 mm. To do this, you can use a grinder with a cutting disc or a plasma cutter. And you can cut it on an ordinary tape saw. The sharp edges of the workpiece are rounded or trimmed.
In the next phase of work, a steel bar approximately 3 mm thick will be required. As an option, the welding electrode can also be taken. Naturally, first it will need to be repulsed from the coating. From a steel bar we make a bracket that will hold the belt.

The process of making a homemade buckle
After you have made the bracket, you will also need to make a small hook that will hold the belt. A nail 120 mm long is perfect for this - its thickness is just about 4 mm. A pin about 10-12 mm long will need to be cut from the nail itself.

The finished bracket and pin are welded to the metal plate. Then, from a wooden plank (you can use oak or beech), we cut a rectangular blank, which will need to be glued to the surface of the metal plate.

At the last stage of the work, it remains only to transfer the image to the surface of the wooden lining. How to do this, you can see in the video on our website.